

Are you a Sound Artist or a Music Composer? No matter what you are but if you play with different music sets ups, then Logic Pro X is one of the best of applications for you to take your music collections to the pro.
Logic Pro X was developed by Apple and could be used on Mac OS only. But there are some tricks and tips that help you in installing in Windows PC. Yes! You heard it right. Logic Pro X can be installed on your Windows PC too. Read this article till the end to know-how.
What Is Logic Pro X?
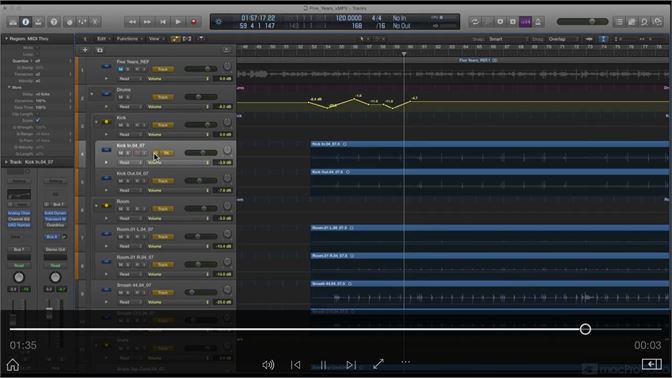
The Logic Pro X is a workstation for digital audio where you can experiment with beats and sounds to compose your new music. It is created by Apple and runs on Mac OS. The cost of this application in-app store of apple is ₹16,253(INR). Logic Pro X is so easy and easy to use that newbies can master it fast.

Recording and Editing audio files with a set of premium tools can be done on Logic Pro X. One good thing worth mentioning here is that Logic Pro X has many plugins that add extensive features to the application. You just simply download and install the plugins to Logic Pro X.
What Can You Do With Logic Pro X?
Logic Pro X is a bundle of premium tools for editing the audio and composing the music. Here are some of the primary functions of this application:
- It supports more than 770 musical instruments.
- Best for creating Mashups & Bass Boosted Remixes.
- It provides you access to the 2500+ sound effects.
- AMP helps you in building your own accompaniment.
- The time and Tempo of every record can be adjusted.
How To Install Logic Pro X On Windows PC?
Currently, there is no Windows Version of Logic X Pro developed by apple. So To use Logic Pro X on your Windows PC, you need to Install Mac Os on your PC using Virtual Box. It is not that difficult to do so. Just follow the simple steps mentioned below:
» Download And Set Up Your Virtual Box
As of now, you have downloaded and extracted Mac OS, and now you have to set up your virtual box to install Mac OS on it. Just follow these simple steps to know how to set up a virtual box on Windows PC. Let’s begin:
- Before you start setting the virtual box on your Windows device, you need to Enable PC virtualization from your BIOS Settings.
- Now, Download the latest version of Virtual Box on your PC.
- After downloading the setup file, click on it.
Click on the “Next” button till the end.
» Setting The Virtual Box
Here are the steps that will help you in setting the virtual box on your Windows PC.
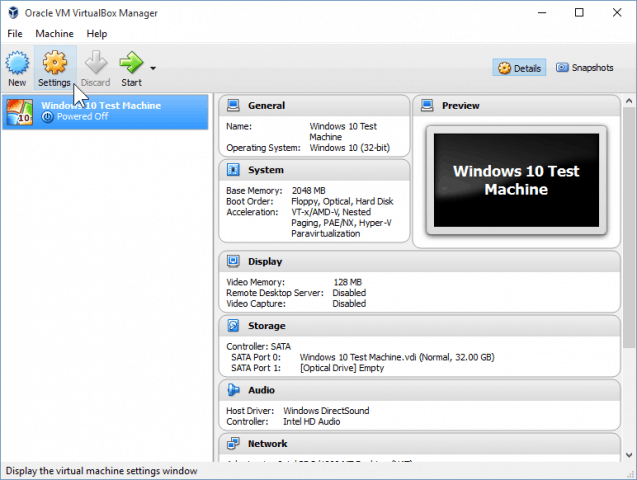
1. First of all, you need to create a New Machine on the virtual box.

2. You will be given options to name your Machine and upload the file with configurations along with choosing RAM Size.

3. You have to select on “Use an existing virtual hard disk file” option and then Left-click on the “File” icon.

4. Click on the “Add” icon on the Top Left of the screen.
5. Now, here, you have to choose and upload the Mac OS file file with the .vmdk extension.
6. Click on the Choose button, and you will be shown a new tab with the option of Create on the Bottom. Click on the “Create” button.
» Final Editing
These are the final steps that will guide you on editing your Virtual machine to make it MAc Os compatible. Let’s start:
1. Click on Mac OS From the left sidebar to make further editing.
2. After clicking on the Mac OS, you need to make specific changes to the settings. There will be three different tabs shown in the settings window. We will configure them one by one.
3. In the Motherboard tab, you need to “Uncheck Floppy & Network Option” and choose Select Chipset as ICH9.

4. In the Processor Tab, you need to “Set Processor to 2“.

5. Move down to the sidebar and click on Display and Set the Video Memory to <128 and click Ok.
» Adding Code To Virtual Machine Via Command Prompt(CMD)
Now you need to add code to your virtual machine using CMD. Here are the simple steps to do so:
1. Open CMD using the start button and Click On “Run As Administrator. “
After opening CMD, you have to use the given list of codes one by one. Replace “Virtual Machine” with your machine name.
cd “C:\Program Files\Oracle\VirtualBox\”
VBoxManage.exe modifyvm “Virtual Machine” –cpuidset 00000001 000106e5 00100800 0098e3fd bfebfbff
VBoxManage setextradata “Virtual Machine” “VBoxInternal/Devices/efi/0/Config/DmiSystemProduct” “iMac11,3”
VBoxManage setextradata “Virtual Machine” “VBoxInternal/Devices/efi/0/Config/DmiSystemVersion” “1.0”
VBoxManage setextradata “Virtual Machine” “VBoxInternal/Devices/efi/0/Config/DmiBoardProduct” “Iloveapple”
VBoxManage setextradata “Virtual Machine” “VBoxInternal/Devices/smc/0/Config/DeviceKey” “ourhardworkbythesewordsguardedpleasedontsteal(c)AppleComputerInc”
2. VBoxManage setextradata “Virtual Machine” “VBoxInternal/Devices/smc/0/Config/GetKeyFromRealSMC” 1
3. After running these codes on your PC, your Virtual machine is ready to use. Now you can move back to your virtual box and click on Start.
4. A black display with specific codes will be displayed on your screen as it will take some time to Start.
5. You have to follow regular MAC instructions, such as setting up Country, Language, and Keyboard, and you are good to go.
6. After agreeing to all license agreements, you can create your login credentials.
7. As of now, your Max Os has been installed successfully. Now you must navigate the app store and download the “Logic Pro X. “
Summary
Professional Sound Artists trust Logic Pro X a lot for their works. If you are also a beginner and looking for a career in music composing, then Logic Pro X is the best application for you. No worries, if you don’t own a MAC, you can run it on windows, too, with the help of this Guide.
I have tried my best to include all the steps so that you don’t have any difficulty running Logic Pro X on your Windows PC. If you are still facing any issues with Installing Mac OS on your PC, then you can surely tell us in the comments section. I will surely guide you.